Learn the Art of Surfboard Ding Repair
Alright, alright, it's February and maybe some of you came up with a few resolutions at the beginning of the year. Maybe some of you are actually sticking to them, or maybe you are like me, and don't even bother to fool yourself into thinking you're really gonna change your ways! Whatever the case may be, if you are a surfer I hope you will consider, not nesesarily a resolution to do your own Ding Repair, but ding repair as a fun new thing to learn!

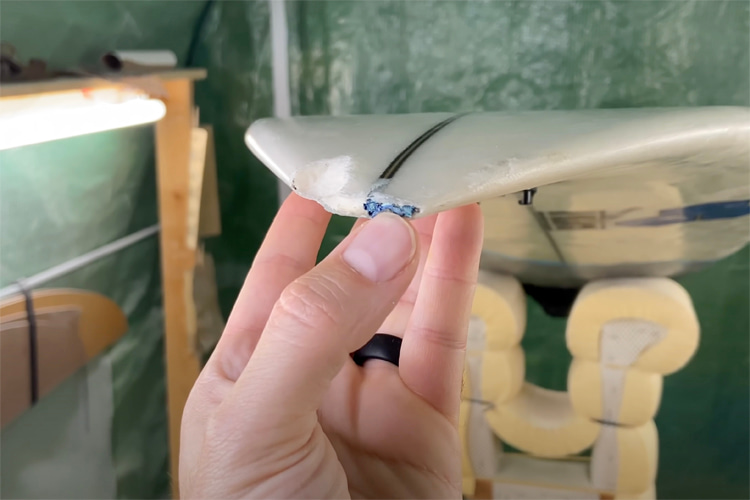
Surfboard ding repairs are not as hard as you think and can save you time without your favorite board and money! Who doesn't want to save money, surfer or not and who wants to be boardless, waiting for a repair to be finished, when the waves get good? Nobody! Learn to fix your own boards and you'll be stoked in so many ways. I'm not talking buckled boards or those snapped in half, even fin boxes should be left to a professional, but the little bonks on the garage door or the run in with some kook in the lineup, these, you can tackle! A small little crack, just make sure it's dry to the foam, throw some Sun Cure on that sucker and lightly sand after 5 minutes! Done! Back out in the water that afternoon or the next day no problem. Once you start fixing the small dings on your own, you'll get the hang and start stepping it up when you need to.
So if I've managed to convince you to give it a try, here's what you'll need:
MINOR DINGS:
Solar Resin (or a sun cure kit, great for traveling on a short trip. No catalyst needed, just cures in the sun by UV rays, in about 5-10 minutes)

Gloves
Safety mask and goggles
Sandpaper
SLIGHTLY DEEPER MORE SUBSTANTIAL DINGS:
Sanding resin and catalyst
Fiberglass cloth - 4oz or 6oz
Acetone
Q-cell
Masking tape
A Spreader
Small cups (like an old coffee cup rinsed out)
Popsicle sticks or equivalent
Paint brush (cheapy)
Gloves
Safety mask and goggles
Sandpaper 110 grit- 350 grit
HIGHLY RECOMMEND: Ding Repair Scriptures (a great book on how to do ding repair, with drawings and all)
Step 1:
Make sure your board is completely dry inside and out. Squeeze it a tad to see if any water comes out. Prop it up so that the dinged area is down and draining.
Remove all wax. This is a great time to set yourself up right with a water-tight board and a new deck of wax after the repair.
Step 2:
Once dry and cleaned up, remove any crusty broken glass and any damaged or old nasty foam. Use acetone or Wax Remover to clean away any dust or left over wax. Once it's clean ,lightly sand the area you will be fixing, this will help the new resin adhere well.
Step 3:
Use the masking tape to tape off the area surrounding the ding, in order to keep your resin and necessary sanding in a limited space.
Step 4:
Here goes! For a small ding just add either the Solar Resin or Sanding Resin (mixed with Catalyst as directed). If you've got a larger ding or more of a "hole" situation, you'll need to add some Q-cell to your Sanding Resin/Catalyst mixture. Slowly pour it into the hole or gouge watching that bubbles don't form and using your popsicle stick to get the mixture properly pushed into the ding area. The mixture should sit above the board's original contour just a tad. Wait for it to harden. (Place Suncured (Solar Resin) repairs in the sun to cure)
Step 5:
Go ahead and sand it after the resin is no longer sticky to the touch. Sand it down till the resin mixture is flush with the board. For suncure on a surf trip you can call it if it looks watertight and well covered. You're ready to ride!
If it's a minor ding using sanding resin, add one more layer of resin with a bit more catalyst added, and sand it starting with 110 grit working your way up incrementally to about 350 grit sandpaper. Done.
For the bit more major ones you'll want to cut a couple of circles of Fiberglass. The first should be about 1/2 inch larger than the diameter of the ding and the second 1/2 inch larger than the first circle. Lay the first smaller cut glass down on the ding, making sure it lays as flat against the board as possible. Mix some sanding resin (about 1 oz resin and 10 drops of catalyst) stirring well until it starts to heat up or go off.
Step 6:
Apply the "heated" resin to the glass with a paintbrush, take your time to make sure the cloth lays flat and the resin absorbs into the glass. Then repeat with the larger layer of fiberglass, making sure that you keep the layers tight against the board and the resin even and fully covering.
Step 7:
Once the area is cured and hardened, sand again making sure you go slow and gentle as not to sand through. Mix a little more resin for your "hot coat" adding a bit of extra catalyst. Use the paintbrush to add one last layer over the entire ding area and wait for it to dry.
Step 8:
Lastly, wetsand the repaired area using a high grit sandpaper (200+) and let cure for at least 24 hrs.
Let's Goooooo!!
You did it!